Ultralight Solo Backpacking Tent
Nemo Hornet Osmo 1p
$400, 1 lb. 13 oz./822g
backcountry.com
The wind never cut us a break while backpacking in the Wind River Range in August. For hours a day on the trail, it literally knocked us off-balance at times. And then it pounded us every night. Finally, on our last evening, it blew in with a violent thunderstorm that generated gusts probably exceeding 40 mph/64 kph and perhaps reaching 50 mph/80 kph, accompanied by driving rain for several hours. Although a friend (in another tent) and I didn’t sleep a wink until that storm abated well after midnight, the Nemo Hornet Osmo 1p kept me dry and survived those tempests while demonstrating its strengths and nice design features.
I slept in this tent for two of our three nights in the Winds and three of six nights backpacking in Glacier National Park in mid-September; on both trips, a friend and I swapped out using the Hornet Osmo 1p and another solo tent I was testing out, so both tents received nine nights of hard testing (as of this writing, with more use to come). Across those nights, low temperatures ranged from around 50 Fahrenheit to the upper 30s (about 3 to 10 Celsius). In addition to nightly, strong gusts in the Wind River Range, plus hard rain one night, we saw rain one night in Glacier.
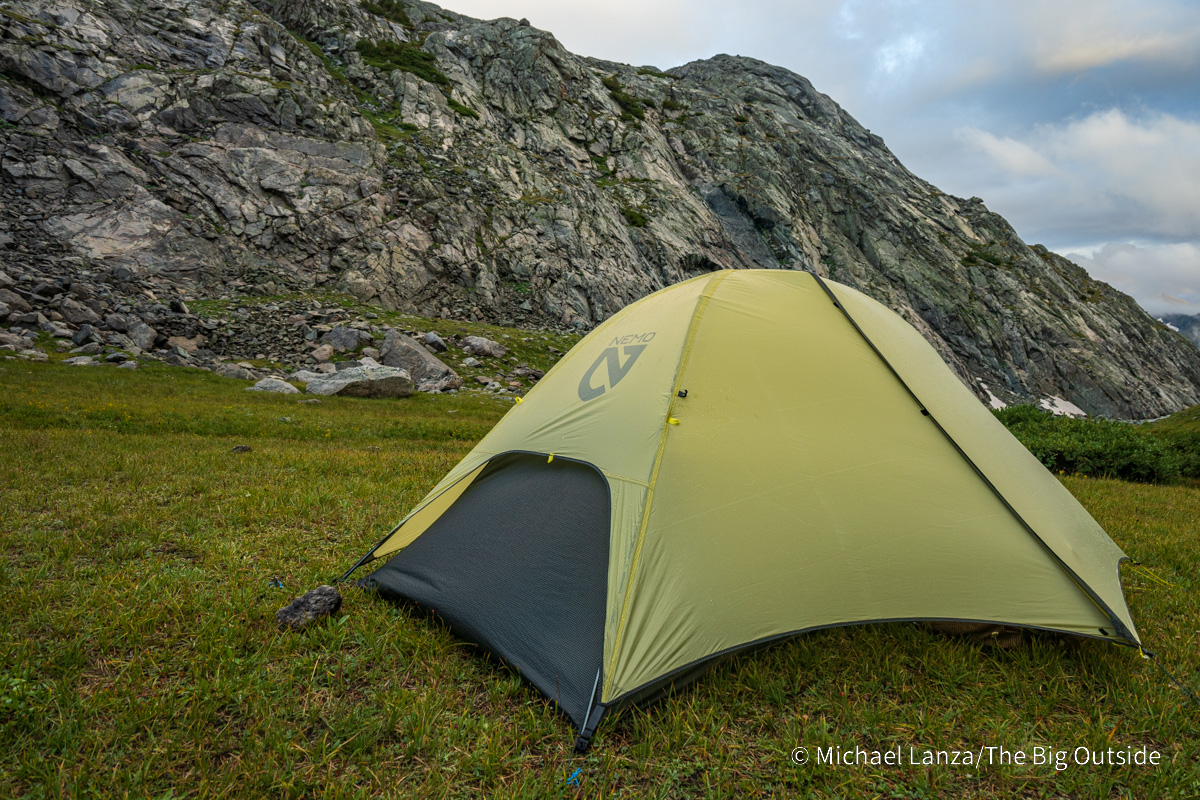
And the Hornet Osmo 1p stood up solidly to most of those severe conditions. The strongest gusts caused the windward wall of the tent to bow deeply inward, bending the pole so much that I occasionally had to hold the walls up with both hands to avoid damage. But in fairness, few backpacking tents—not only in this weight class, but most of today’s best three-season backpacking tents—are designed for those conditions. We also could have camped at a more protected spot at a somewhat lower elevation instead of in a lake basin at well over 10,000 feet with no wind breaks of any kind. (An earlier thunderstorm had already passed and we had bluebird skies when we set up camp.) On another night in the Winds, in a camp partly protected by trees near Washakie Lake, the Hornet Osmo 1p tent held up fine in gusts well over 30 mph.
As I wrote in my review of Nemo’s Hornet Osmo 2p, I think what most distinguishes the Hornet Osmo tents from competitors in this category is less about weather—tents with this structural design in this weight class will deliver enough protection for most backpackers—and more about details that are easily overlooked but affect the user experience in almost every aspect from setup to interior and vestibule space and ventilation.
Plan your next great backpacking trip on the Teton Crest Trail, Wonderland Trail, in Yosemite or other parks using my expert e-guides.
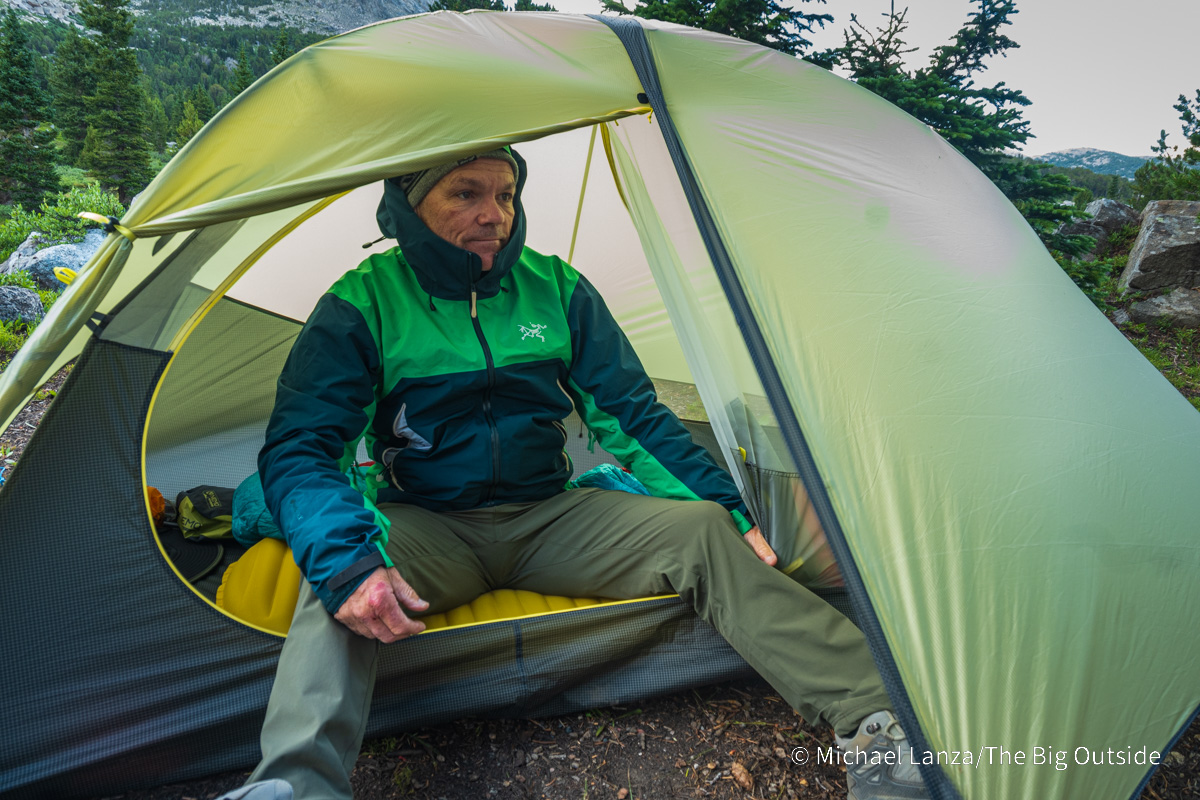
Most distinctively, Nemo’s proprietary Osmo fabric, used in the rainfly and floor of the Hornet Osmo tents, combines 100 percent recycled nylon and polyester yarns to rise above traditional nylon in its performance in rain. Nemo says the nylon fibers provide 20 percent more strength than standard nylon (of similar weight) while the hydrophobic polyester fibers increase the fabric’s water resistance by a factor of four and reduce the amount it stretches when wet by a factor of three.
Plus, Osmo achieves water repellency with a finish that’s free of PFC/PFAS chemicals and meets flammability requirements without chemical additives. I’ve seen no concerns about durability so far.
The Hornet Osmo 1p exists in a small category of semi-freestanding, double-wall, solo tents weighing under two pounds/907 grams. These tents are not as crazy-light as non-freestanding solo shelters that pitch using trekking poles, but they are significantly faster and more intuitive to pitch and their double-wall design avoids the condensation that tends to plague many single-wall tents.
Find your next adventure in your Inbox. Sign up now for my FREE email newsletter.
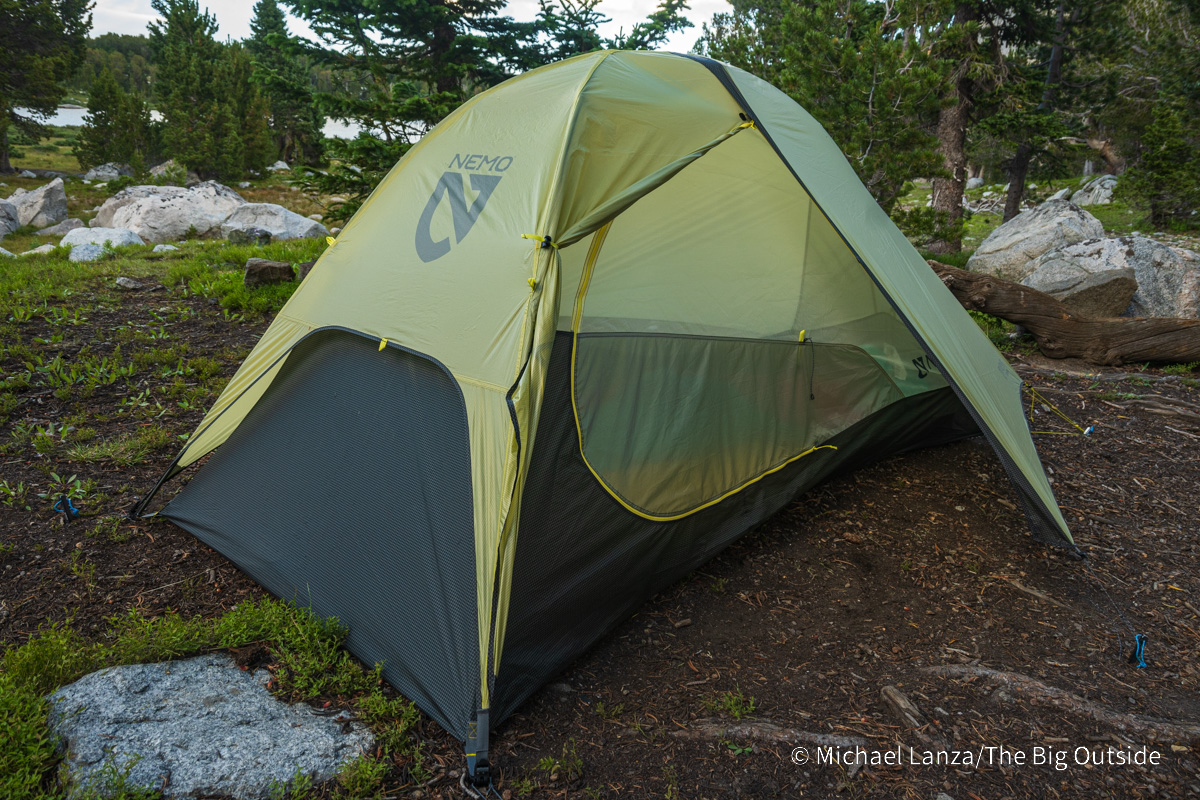
At a minimum weight of 1 lb. 13 ounces/822 grams (just the tent, poles, and rainfly), the Hornet Osmo 1p offers ease of use and good living space at a minimal weight penalty versus competitors. To compare it with two solo tents that share this semi-freestanding design and similar materials and both have slightly less interior space but a slightly larger vestibule: the Big Agnes Tiger Wall UL1 Solution Dye weighs an ounce more (see my review of the Tiger Wall UL2 Solution Dye) and the MSR Freelite 1 comes in three ounces lighter (see my review of the Freelite 2).
With 22.3 square feet/2.1 square meters of interior space, a 39-inch/98cm peak height, and a floor measuring 87×43/31 inches/222×108/79 (it tapers from head to foot), the Hornet Osmo 1p offers a relatively spacious interior and good headroom for an ultralight solo tent. It’s a bit more than twice the width of a standard 20-inch-wide air mattress at the head end and 11 inches wider at the foot end, creating extra space for your stuff, and long enough for tall people.
The interior door is reasonably large for a tent in this weight class, for easy entry and egress—made even easier by having the door on the side rather than at the head end, which also improves ventilation. The vestibule has 7.3 square feet/0.7 square meter of storage, enough to squeeze shoes and a midsize backpack under one side of it; and you can roll up one or both sides of the vestibule for maximum venting and a view of the night sky (and we had some amazing Milky Way skies in both the Winds and Glacier).
While the Hornet Osmo 1p has a good space-to-weight ratio for any double-wall tent, any tent in this weight class is targeted more to minimalists who prioritize low weight over living space—who will likely occupy the tent primarily during sleeping hours and often spend most of each day on the trail.
I’ve helped many readers plan unforgettable backpacking and hiking trips.
Want my help with yours? Click here now.
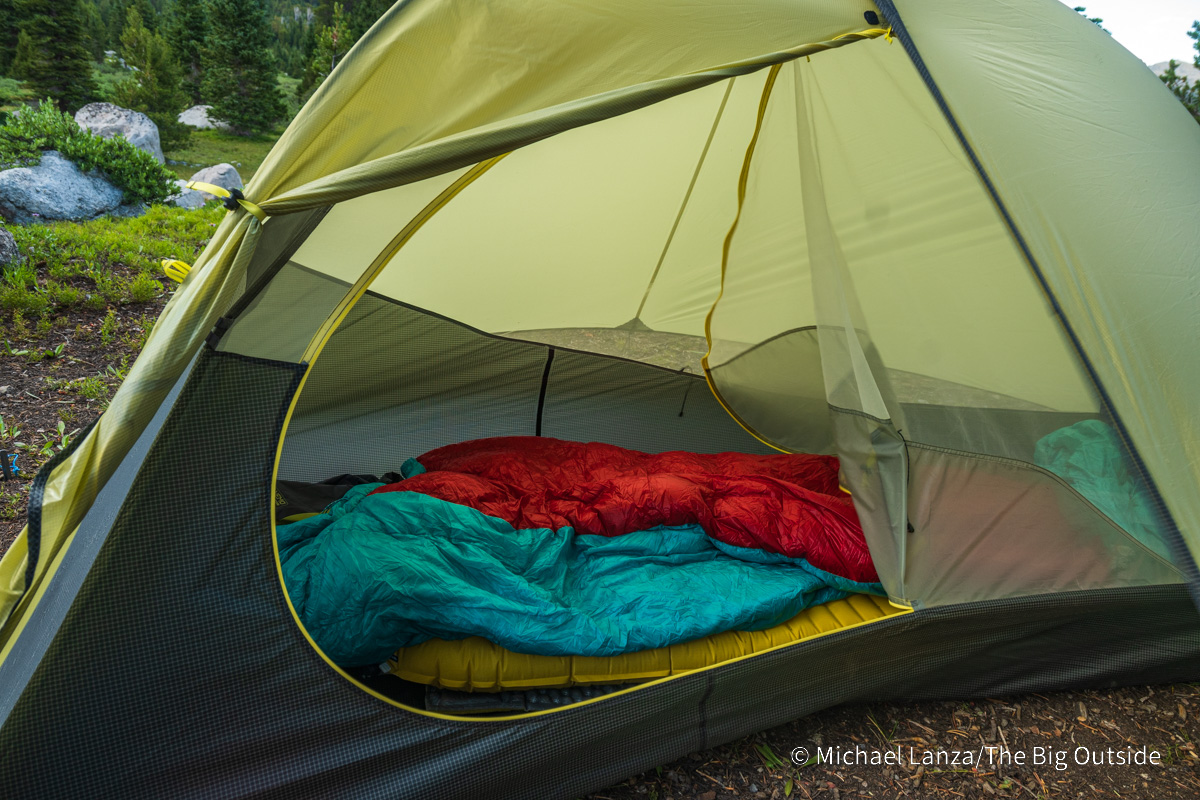
The smart and easy-to-use door tiebacks are a nice detail. Inside, there’s just one storage pocket on the wall at the head end, where you wouldn’t want to place much weight or bulk. But again, the point of this tent is to offer no more than what’s necessary, minimizing weight. Besides, many backpackers seeking an ultralight solo tent likely have their system and organization down and may not prioritize pockets.
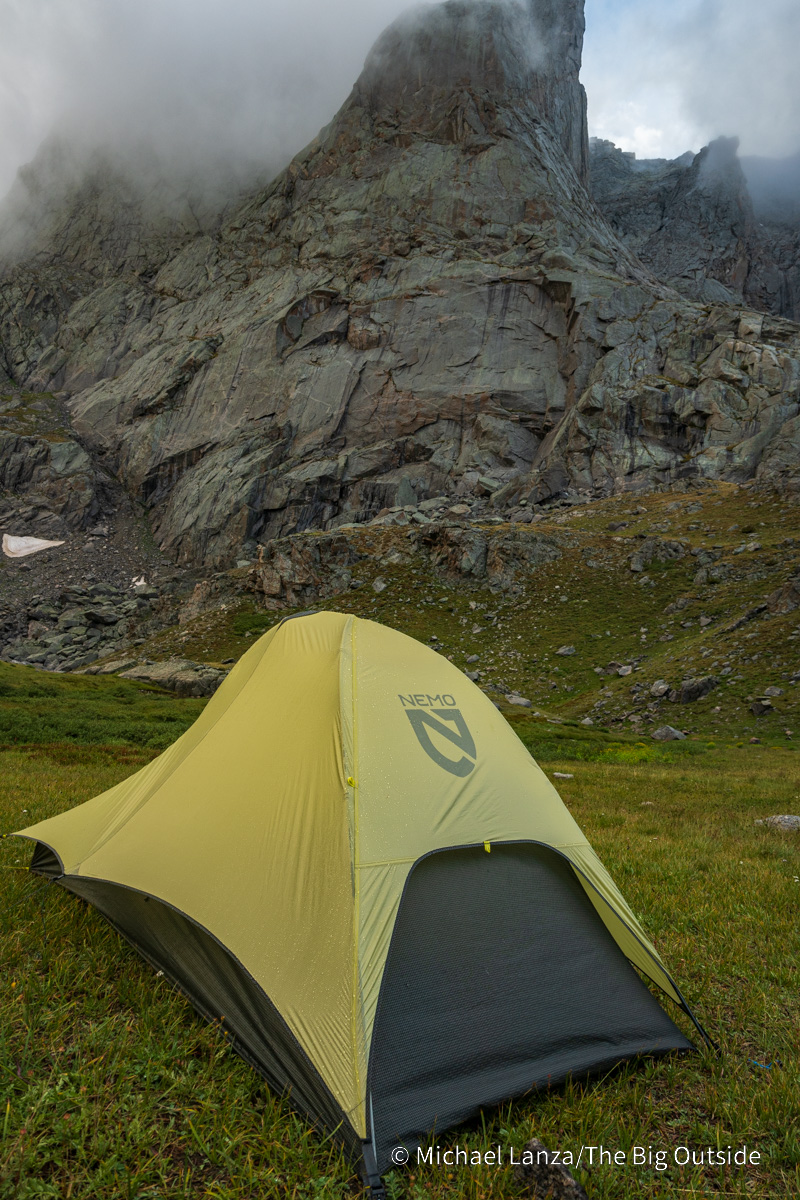
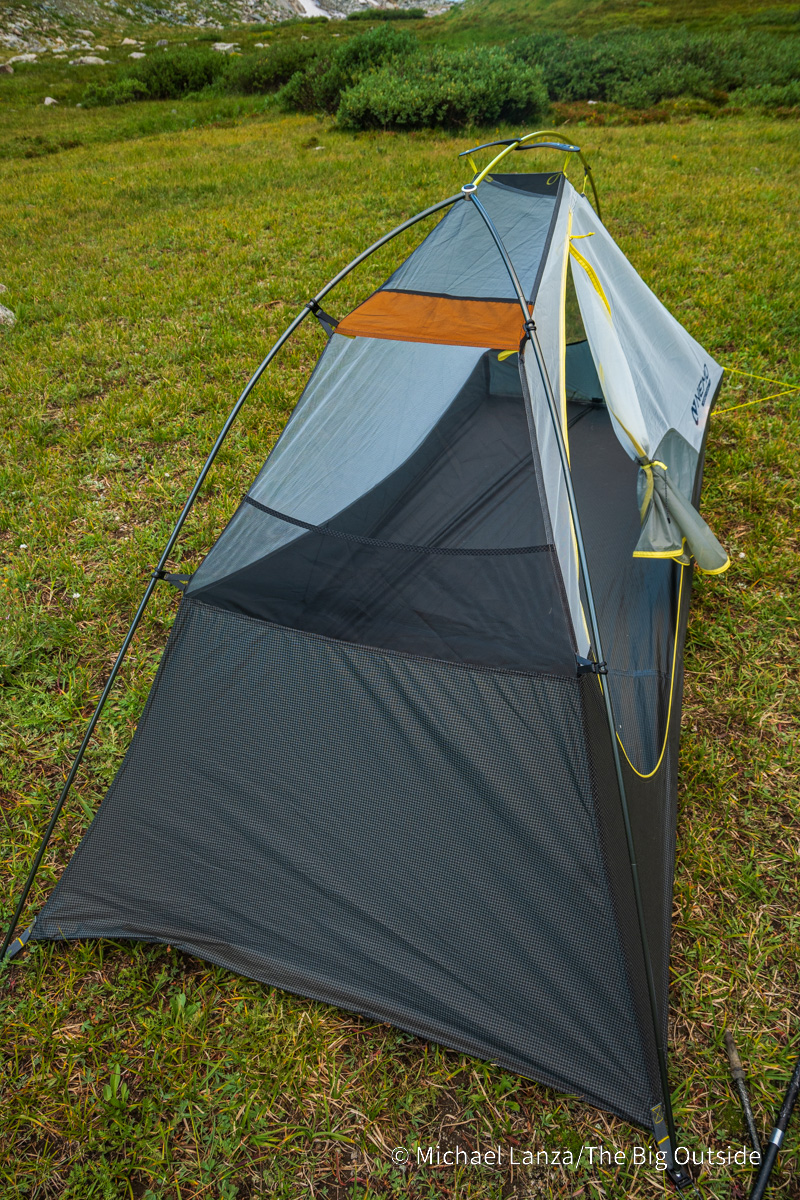
As with all tents using this basic semi-freestanding design, set-up is simple and fast. Y-shaped, color-coded DAC Featherlite NSL poles that join at a single hubbed intersection feature a center ridgeline that forks to two corners—a common pole structure that trims weight but requires staking (thus, it’s “semi-freestanding”).
The short Flybar snaps into place across the main ridge pole’s high center point to pull the side walls outward, creating nice headroom. While that’s a common feature in backpacking tents, the Flybar’s flexible design makes it easier during setup than some others and distributes tension evenly. Triangulated corner guy-outs pull the lower tent walls outward to minimize contact between any condensation on the walls and sleeping bags. Just six clips and three grommets attach the interior tent canopy to the poles and the Hornet requires just six stakes.
A friend who backpacked with me and had never seen this tent before proclaimed it “very easy to pitch.”
The 15-denier nylon ripstop with no-see-um mesh interior walls enable excellent ventilation, aided by the bottom edge of the rainfly being elevated off the ground to promote low-high air flow. On calm, cool nights, I saw only minimal dampness on the underside of the rainfly—not nearly enough to drip or even rub off on a sleeping bag brushing against a wall. Ventilation improves greatly when the rainfly door is kept at least partly open.
Much credit for that ventilation goes to another unique Nemo tent feature: a large cutout in the rainfly at the head end of the tent, overlapping a solid panel on the lower part of that interior tent wall. During that violent thunderstorm in the Winds, the swirling wind occasionally caused spritzes of mist to blow under that cutout and spray me very lightly, but not enough to get anything even slightly damp. In a typical rainstorm, no rain blows inside even as that cutout creates exceptional air flow.
Planning your next big adventure? See “America’s Top 10 Best Backpacking Trips”
and “Tent Flap With a View: 25 Favorite Backcountry Campsites.”
With all Hornet tents, the rainfly door zips open beyond the high point of the interior door, giving them a drip line that permits rain to fall inside. With a little care, though, you can enter and leave the tent letting virtually no rain inside, possibly by not unzipping the rainfly door entirely.
The packed size of 12.5×7.5×3 inches/32x19x7 centimeters makes it more packable than comparable tents. But its packed length is most unique: While I normally load tent poles separately into my pack—standing them up in one corner to accommodate their length—the Hornet’s tent poles are so compact when folded that I could leave them inside the divvy cube stuff sack with all the tent components and easily lay it horizontally into my pack. All new Nemo tents come with a 100% recycled fabric pole bag (instead of wasteful, single-use poly bags).
Other models in this series are the Hornet Osmo 2p ($430, 2 lbs. 1 oz./948g) and Hornet Osmo 3p (2 lbs. 13 oz./1.28kg), plus two lighter models, the Hornet Elite Osmo 1p ($550, 1 lb. 7 oz./657g) and Hornet Elite Osmo 2p ($650, 1 lb. 11 oz./779g).
See my review of Nemo’s Hornet Osmo 2p.
Nemo Hornet Osmo 1p
The Verdict
For lightweight and ultralight backpackers and thru-hikers seeking a solo tent that doesn’t compromise on performance details like ease of use, strength, living space, and ventilation, the Nemo Hornet Osmo 1p and the entire Hornet Osmo series deserve a serious look.
BUY IT NOW
You can support my work on this blog, at no cost to you, by clicking any of these affiliate links to purchase a Nemo Hornet Osmo 1p at backcountry.com, moosejaw.com, or nemoequipment.com, or any Hornet Elite Osmo tent at backcountry.com, moosejaw.com, or nemoequipment.com.
See “The 10 Best Backpacking Tents” and all reviews of backpacking tents, ultralight backpacking tents, backpacking gear, and ultralight backpacking gear at The Big Outside. See also “5 Tips For Buying a Backpacking Tent” and “Ultralight Backpacking Tents: How to Choose One.” (Both of those stories require a paid subscription to The Big Outside to read in full, which costs as little as $7, or under $5 per month for an entire year.)
Let The Big Outside help you find the best adventures.
Join now for full access to ALL stories and get a free e-guide and member gear discounts!
Whether you’re a beginner or seasoned backpacker, you’ll learn new tricks for making all of your trips go better in my “How to Plan a Backpacking Trip—12 Expert Tips,” “A Practical Guide to Lightweight and Ultralight Backpacking,” and “How to Know How Hard a Hike Will Be.” With a paid subscription to The Big Outside, you can read all of those three stories for free; if you don’t have a subscription, you can download the e-guide versions of “How to Plan a Backpacking Trip—12 Expert Tips,” the lightweight and ultralight backpacking guide, and “How to Know How Hard a Hike Will Be.”
NOTE: I tested gear for Backpacker magazine for 20 years. At The Big Outside, I review only what I consider the best outdoor gear and apparel. See The Big Outside’s Gear Reviews page for categorized menus of all gear reviews and expert buying tips.
—Michael Lanza
